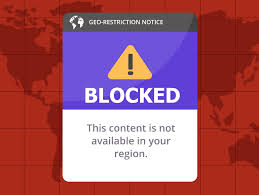
In an increasingly globalized world, streaming services often restrict content based on geographic locations. A Virtual Private Network (VPN) can help you bypass these restrictions, allowing you to access your favorite shows and movies from anywhere. This guide will walk you through the best practices for using a VPN for streaming, ensuring you enjoy a seamless viewing experience.
Why Use a VPN for Streaming?
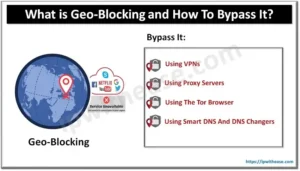
Using a VPN for streaming provides several benefits:
- Access Geo-Restricted Content: Bypass regional restrictions on platforms like Netflix, Hulu, and BBC iPlayer.
- Enhanced Privacy: Keep your online activities private from your Internet Service Provider (ISP) and potential snoopers.
- Avoid Throttling: Prevent ISPs from slowing down your connection when they detect streaming activity.
Best Practices for Using a VPN for Streaming
1. Choose the Right VPN Provider
Not all VPNs are created equal, especially when it comes to streaming. Here’s what to look for:
- Streaming-Friendly Servers: Ensure the VPN has servers optimized for streaming services.
- High-Speed Connections: Look for a VPN that offers fast speeds to avoid buffering.
- No-Logs Policy: Choose a provider that doesn’t keep logs of your online activities for added privacy.
2. Check for Compatibility
Before subscribing, check if the VPN supports the streaming platforms you want to access. Popular services like Netflix, Hulu, and Amazon Prime Video often have specific VPN blocks, so ensure your chosen VPN can bypass these.
3. Install the VPN App
Once you’ve selected a VPN provider:
- Download the App: Install the VPN application on your device (Windows, Mac, iOS, Android, etc.).
- Log In: Open the app and log in with your credentials.
4. Connect to a Server
To access geo-restricted content:
- Select the Right Server: Choose a server located in the country where the content is available. For example, connect to a US server to access American Netflix.
- Connect: Click the “Connect” button to establish a secure connection.
5. Clear Your Browser Cache
After connecting to the VPN:
- Clear Cache and Cookies: This helps remove any previous location data that could reveal your actual location.
- Restart Your Browser: Close and reopen your browser to ensure the changes take effect.
6. Access the Streaming Service
Now that you’re connected to the VPN:
- Open the Streaming Platform: Go to the website or app of the streaming service you wish to access.
- Log In: Enter your account details and enjoy your content!
7. Troubleshooting Connection Issues
If you encounter issues accessing content:
- Try Different Servers: Some servers may be blocked by streaming services. Switch to another server in the same country.
- Check VPN Settings: Ensure that your VPN settings are configured correctly. Some VPNs offer a “Streaming” mode that optimizes performance.
- Contact Customer Support: If problems persist, reach out to your VPN’s customer support for assistance.
8. Stay Updated on VPN Performance
Streaming services frequently update their systems to block VPNs. To maintain access:
- Regularly Check for Updates: Keep your VPN app up to date to benefit from the latest features and security patches.
- Follow VPN Provider News: Stay informed about any changes to your VPN’s ability to access specific streaming services.
Conclusion
Using a VPN for streaming can significantly enhance your viewing experience by providing access to geo-restricted content and ensuring your online privacy. By following these best practices, you can enjoy your favorite shows and movies from anywhere in the world without interruptions.
Ready to unlock a world of content? Choose a reliable VPN provider Today , follow these steps, and start streaming without limits! Read our dedicated blogs by Clicking here for Everything about Best Sreaming VPNs. Join the Tribe at VPN Voyager and stay updated.