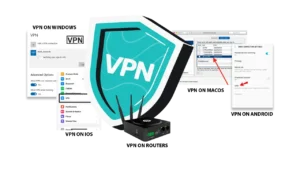
Setting up a Virtual Private Network (VPN) is a crucial step in enhancing your online privacy and security. Whether you’re using Windows, Mac, iOS, Android, or routers, this guide will provide you with clear, step-by-step instructions to get your VPN up and running on various devices.
1. Setting Up a VPN on Windows
Step 1: Choose a VPN Provider
Select a reputable VPN provider and sign up for a plan.
Step 2: Download the VPN Software
- Visit the provider’s website.
- Download the Windows app.
Step 3: Install the VPN App
- Open the downloaded file.
- Follow the installation prompts.
Step 4: Log In
- Open the VPN app.
- Enter your account credentials.
Step 5: Connect to a Server
- Select a server location.
- Click “Connect” to establish the VPN connection.
Step 6: Verify Your Connection
Check your IP address using an IP checker to confirm that the VPN is active.
2. Setting Up a VPN on Mac
Step 1: Choose a VPN Provider
Sign up for a VPN service that supports macOS.
Step 2: Download the VPN Software
- Go to the provider’s website.
- Download the Mac app.
Step 3: Install the VPN App
- Open the downloaded file.
- Drag the app to your Applications folder.
Step 4: Log In
- Launch the app.
- Enter your account credentials.
Step 5: Connect to a Server
- Choose your desired server.
- Click “Connect” to initiate the VPN connection.
Step 6: Verify Your Connection
Use an IP checker to ensure your IP address reflects the VPN server.
3. Setting Up a VPN on iOS (iPhone/iPad)
Step 1: Choose a VPN Provider
Select a VPN service compatible with iOS.
Step 2: Download the VPN App
- Open the App Store.
- Search for your VPN provider’s app.
- Download and install it.
Step 3: Log In
- Open the app.
- Enter your login details.
Step 4: Connect to a Server
- Select a server location.
- Tap “Connect” to start the VPN.
Step 5: Verify Your Connection
Check your IP address using an IP checker to confirm the VPN is active.
4. Setting Up a VPN on Android
Step 1: Choose a VPN Provider
Sign up for a VPN service that supports Android devices.
Step 2: Download the VPN App
- Open the Google Play Store.
- Search for your VPN provider’s app.
- Download and install it.
Step 3: Log In
- Launch the app.
- Enter your account credentials.
Step 4: Connect to a Server
- Choose your preferred server location.
- Tap “Connect” to establish the VPN connection.
Step 5: Verify Your Connection
Use an IP checker to ensure your IP address is masked by the VPN.

5. Setting Up a VPN on Routers
Step 1: Choose a VPN Provider
Select a VPN service that supports router configuration.
Step 2: Access Your Router Settings
- Connect to your router via a web browser (usually by entering 192.168.1.1 or 192.168.0.1).
- Log in with your router’s admin credentials.
Step 3: Find VPN Settings
- Look for a section labeled “VPN” or “Advanced Settings.”
- This varies by router brand and model.
Step 4: Enter VPN Configuration Details
- Input the VPN provider’s settings (you can usually find these in their support documentation).
- This may include the server address, your username, and password.
Step 5: Save and Connect
- Save the settings.
- Connect to the VPN through the router interface.
Step 6: Verify Your Connection
Check your IP address on any device connected to the router to ensure the VPN is working.

Conclusion
Setting up a VPN on various devices is a straightforward process that can significantly enhance your online privacy and security. By following these step-by-step guides, you can ensure that your data remains protected across all your devices.
Call to Action
Ready to secure your online activities? Choose a reliable VPN provider HERE and follow these simple steps to set up your VPN on any device!
AFFILIATE DISCLOSURE : At VPN Voyager, we believe in transparency and honesty. As a dedicated affiliate marketing site, we may earn a commission when you make a purchase through the links on our website at no extra cost to you. We only recommend products we trust and believe will benefit our readers. Your support helps us continue providing valuable content.